

SNestor
-
Posts
2089 -
Joined
-
Last visited
Content Type
Profiles
Forums
Gallery
Posts posted by SNestor
-
-
5 hours ago, Alaskan_Son said:
Sorry, have to get back to work and don't have time for this anymore. I see what you're talking about though. That situation is just not one Chief has been programmed to handle very well. There are a few tricks that can be employed in combination such as:
- Reducing ceiling plane thickness to get rid of the unwanted bands
- Using an extra roof plane (defined to be structurally invisible by adjusting settings and using a Gap material type) down at the ceiling height to cut walls off down there instead of up at the main roof plane (would require hole in upper roof plane to be adjusted
- Creating a dormer room set as Open Below
- Using unique wall types for the dormer walls to make layers disappear where desired
- Using Gap material types where beneficial in some of your object definitions
- Manually reshaping wall polylines (probably not necessary though)
- And obviously using polyline solids...in this case I would likely only use them to create the interior wall surfaces
I would probably use some combination of the above, but they are all obviously pretty convoluted steps. There's nothing simple or automatic I know of to accurately model that.
So...all that said I glad to know it wasn't user incompetence. Really...if my hammer was close by I might of smashed my computer.
@Alaskan_Son thanks for taking the time and posting some great suggestions on how to accomplish this task...much appreciated.-
 1
1
-
11 minutes ago, robdyck said:
Where I always get hung up is that The Ceiling Hole options aren't available for a Roof Hole...I don't know why that is.
The entire process is convoluted...Roof hole, ceiling hole, skylight...oh my!
 I'm off to see the wizard...
-
1 minute ago, HumbleChief said:
Yeah I'm sure the author has put tremendous effort in to detailing the way a certain style of house should look but I bristle at the idea that there is definitive 'good architecture.' I also have experience as a general contractor with architects who beat their clients in to 'design submission' because certain design elements were proper or correct according perhaps to a book of some kind. The clients just gave up what they really wanted because the architect knew better. Vowed I would never do that as a designer.
I'm old enough to know when to "stop" suggesting...and give the client what they want.
I think you would agree...HGTV has done a marvelous job creating home designers out of accountants, doctors, IT people...they now are all architectural "experts". Therefore, I decided years ago to give my "paying" customers what they want...unless they ask me for my opinion. I give it to them...and let them decide. I gave up trying to be Frank Lloyd Wright many years ago...
-
2
-
-
@HumbleChief - I own and have read "Get Your House Right"...it's a fine book for what it is.
Basically...the authors aimed the book at builders who attempt to re-create traditional colonial residential architecture and are not paying attention to specific details...which in turn are making the area's of the country where these elitist critics live look "different" and making them feel "uncomfortable".
The book is great if you are attempting to design a colonial home...and want the detailing to look authentic. The book does include many design methods that could translate to other architectural styles...such as "scale", window placement...and even some good tips related to roof design.
But - one things that is as reliable as the sun rising...no one but the person signing the checks is the final arbiter of what constitutes "good architecture".
-
 1
1
-
2
-
-
9 hours ago, solver said:
Not automatically.
Clearly incorrect.
It can be done with a bit of fiddling.

Thanks Eric - yes, it's the "fiddling" that I'm interested in. You pic still does not look like a "perfect" dormer...even with "fiddling". (but...much closer to perfect than anything I've accomplished)-
1
-
-
8 hours ago, Alaskan_Son said:
Can you post a plan so I don’t have to assume things and redraw from scratch myself?
Michael - use the plan Scott posted...it's one we've both worked on. Would love to hear your comments...maybe we are missing something so simple?
-
39 minutes ago, dshall said:
very interesting...... I wanted to do another..... I was able to do it but there is a secret

steve nestor dormer_scissor truss AND ANOTHER AND ANOTHER.plan
Scott - thanks for taking so much time to look at this question...very much appreciated. You are so close on these dormers...which I assume take a lot of expertise and time. However, look at my attached picture of one of your dormers...still lots of issues. Why?
C'mon Chief - give us tools that work...
-
Yea...I realize I could use solids but I guess what I’m wondering is what I’m seeing correct behavior or am I doing something incorrect?
Solids are a work around...and I’m more than capable of using them as a fix. But I’d prefer being able to correctly use the software and build a dormer with the tools Chief provides for this situation.
So the question is - do dormer tools work or not for this type of roof/ceiling condition.
-
OK...I thought I could do this so easily. Nope...I came close to grabbing a stick of dynamite this afternoon.
I am trying to create a dormer over a room that has a vaulted ceiling. Actually...the ceiling plane is at a 4/12 pitch...the roof is at a 9/12 pitch...and this seems to be the problem. The dormer creates a "shaft". If you set the dormer walls to be "roof cuts wall at bottom"...well, the walls get cut off at the 9/12 roof pitch. The ceiling however is way lower than this area...so, it leaves a big gap.
I have tried using a hole in roof...and a hole in the ceiling plane...but, the "shaft" option is always grayed out. So...yes, I'm doing something wrong.
Is there a guru out there that knows the secret to this conundrum?


-
7 hours ago, ChadwickG said:
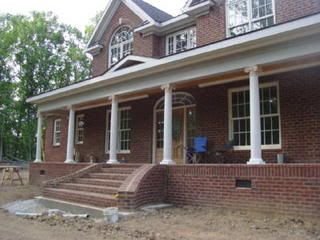
What is the best way to create an archway in the gable on the front porch of this plan? The homeowners are contemplating adding the archway centered on the steps with a barrel ceiling leading to the front entry door. Also, customers would like to see curved brick steps with wing walls similar to the attached photo, how are you guys doing these as well?
Thanks
The key is to create a "room" on the porch where you want to create the curved ceiling.
Then...in this room, open the room DBX and select no ceiling.
Then...use the ceiling plane tool and draw in a ceiling from side to side...with a zero pitch.
Then, select "curved ceiling"...and put an "angle at eave" of about 30 degrees. You can play with the degrees to get the arc you want.To get all this to work I had to rebuild your railing wall...so, something might be wrong with this wall on your plan. I just used the siding-4 wall type and placed the square columns right out of the core catalog....seems to work. I've attached my "fix" plan for you to review...Justin Powell, 6-8-20 - My Chief Skills Fix01.plan

-
1
-
-
On 6/15/2020 at 2:09 AM, rwdozier said:
Attempting a triple gable look that a client likes. Is there a simple way to achieve this look? Here is my stab at it. I just can't seem to get the middle gable reversed without a bunch of manual roof planes. Suggestions appreciated.
Thanks...
On 6/15/2020 at 2:09 AM, rwdozier said:Attempting a triple gable look that a client likes. Is there a simple way to achieve this look? Here is my stab at it. I just can't seem to get the middle gable reversed without a bunch of manual roof planes. Suggestions appreciated.
Thanks...

Just a quick example plan attached....I didn't make it exact...but maybe you can look at what I did with the roof planes and learn what to do to make your plan work.
Here is my example plan: Fix Plan 01.zipHere is a pic of my example plan:

-
1
-
-
Post the plan...
-
On 6/17/2020 at 9:30 AM, pinehawker said:
Maybe I’m lost here but when I am drawing in working plan view I’m looking down on the interior how do I get to where I can add or adjust on the straight on view to adjust the walls
Wall height is controlled by the “ROOM” specification.
-
45 minutes ago, HumbleChief said:
Thanks Steve. Have never edited trusses before and didn't even think that the edit truss layer set would have the truss framing layer locked - by default? Won't fall for that again and am practicing my truss editing skills now to see what I can learn.
I’m with you. I tend to leave truss design to the experts. And - I would not have known that the layer was locked by default....happy you got it figured out and I’m sure your post has helped many of us.
-
1
-
-
6 minutes ago, HumbleChief said:
Thanks Michael, YIKES had the Framing, Roof Trusses Layer locked by default? Frustrating but I think I might have found a quicker method?
I am trying the modify truss technique now to see what I can learn - with the layer unlocked..
You may want to create a specific layer set that you use to edit trusses...where the layers you need are not locked. I’m sure it’s not something you do everyday so maybe it’s not worth the trouble.-
1
-
-
I sent you a message..
-
@robdyck - not at my computer to check but I think the problem is “Newels”. Newels do not trim off at roofs...if your rail doesn’t include Newels it will trim to the roof. Again I’m going from memory so I could be wrong
-
1 hour ago, myrtsbnye said:
I've attached an image of the railing symbol I've created. What the architect wants is a glass panel centered on the newel as shown. She also wants two rails as shown (attached to the outside edge of the newel posts) except the rails are to be continuous by the newels. As you can see the rails stop at each newel post.
Is there a way to get the rails continuous?Thanks

See pic attached. Somewhat easy with a "glass" railing panel...and a molding line. The only trouble spot is if you have an opening....you will have to place breaks in the molding line. In the attached example I used a molding polyline...just because they are easy to control...and turned the molding off on the edge that rests against the house. Newels and glass panel are right out of the core catalog.

-
Screen clip...modified foundation wall with studs/drywall and airspace. As you can see there is a small gap under the stud wall..but, at least the studs are not extending down to the footing.

-
50 minutes ago, robdyck said:
That's right Steve. To avoid the Room that DOES get created there, I'll take a short wall segment, usually in the mechanical room, and give it No Room Definition. I just don't like how the furred walls behave in a few other ways, mostly all the short invisible walls that Chief dimensions to the center. And there are some things I DO like about how they behave. A furred wall allows a basement window to be called out in the correct room, for example.
So when I say I never use them, I should clarify that I almost never use them, and its because the benefits of one method trump the benefits of another method for my typical finished plan set.
If I need the benefits of using the furred wall in a plan set, then of course, they make the cut.
Exactly...
@Kbird1 - Mick (and Chief) suggest creating a foundation wall that includes the airspace/stud/drywall etc. I thought in the past that when you did this the stud wall would actually extend down to the footing...which would not be good. However, just doing a quick test it looks like the stud wall will stop at the floor. So...maybe this is the way to go.
-
5 hours ago, robdyck said:
Yes, but I don't use furred walls for those. I have a separate wall type for the insulation wall and I draw it inside the foundation, then butt it up against the fdn wall. I never ever use a furred wall.
It does not do goofy things with the area calculator, it just doesn't do what you'd like with the area calculator. Read up on how the area is calculated and you'll see it is behaving as it should.
Rob - I think the reason for "furred" wall types is that it eliminates a room behind the wall. I think...
You can assign any wall type as "furred"...I also have a unique wall type for these situations...but, you can use a standard interior-4 as a furred wall if you choose.
I've attached a couple of screen shots from the X12 Manual on furred walls.


-
It's tricky that's for sure. Sometimes I just don't select furred...and things fix themselves.
Below are pics showing how things change depending on wall types...


-
5 hours ago, Lighthouse said:
I'm sure there's an easy answer I'm missing... I've put text on my framing plan on a separate layer called "framing text", so it doesn't show in the default floor plan. However, I cannot get the text arrow to default to that "framing text" layer, it wants to stay on the "text" layer. There does not seem to be a way to set the default layer for the text arrow, and even though my text is set on the "text framing" layer, the arrow is still on the "text" layer. The same is true for text leader lines. How do I get my arrows and leader lines to default to my "framing text" layer? Thanks!!
You need to change the "text" layer in your annotation set...or default set. My example below is using a saved plan view...but, the defaults are tied to the annotation set listed at the top. So...modify the layer that "text" is placed on. (not Rich Text).


-
I’ve done a few videos on dormers - check out my YouTube page.
-
1
-

 I'm off to see the wizard...


Dormer over vaulted ceiling
in General Q & A
Posted
Scott...please, post the "secret". Thanks!