

Ange822
-
Posts
236 -
Joined
-
Last visited
Content Type
Profiles
Forums
Gallery
Posts posted by Ange822
-
-
Thanks I was playing around with that but has unchecked boxed / check flush eave.
Not sure why the soffit material is slightly showing threw;
-
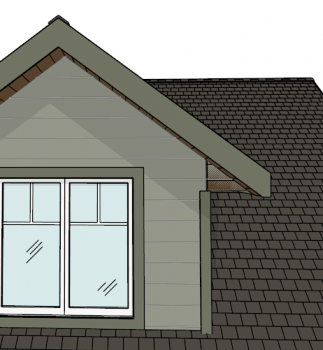
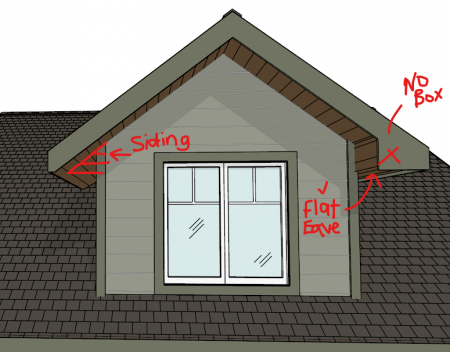
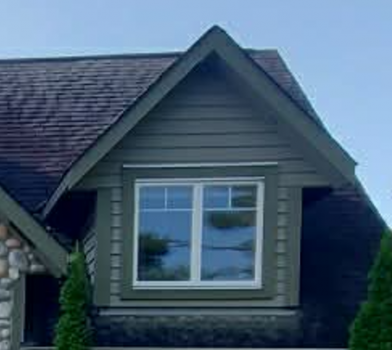
Hi there, Is there a way to have soffit under the eave "flat", and then the gable end continue the siding and have no "boxed eave" at the gable end gable?
-
Maybe try keeping it 1/2" away? Or used polyline solids instead of an actual wall.
-
Thank you everyone for your help with this topic!!
")
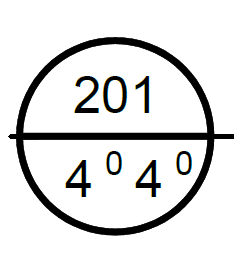
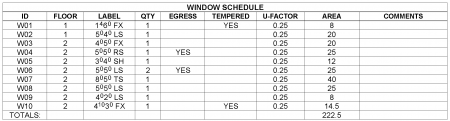
Would anyone know how to do the subscript numbers for the size of the windows / doors?
Not sure if there is a way to have the window number / callout and label both shown in a bubble?
-
39 minutes ago, para-CAD said:
You can reposition the order in the schedule. The first column allows you to drag up or down and the label updates in the plan.
I don't know about floor zero numbering.
Oh wow that is great!! Thank you so much!!
How did you change the size of the window to have the subscript number as the inches?
Is there also a way to have the basement as 001, 002, 003... and then the Main Floor as 101, 102, 103.. and then I can just re-order them?
-
Hi there,
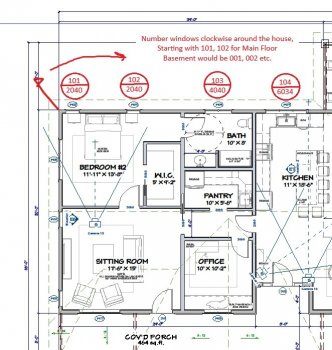
I am new to the window schedule / labels and needing some help.
Is it possible to number the windows clockwise around the house rather than just randomly allocating numbers?
Is there also a way to label them starting with 0 for the basement, and 1 for main floor, 2 for 2nd floor etc.
I was hoping there would be a way to have the window number above the window size.
I tried playing around with "both callout and label" but I'm struggling to make it work.
thanks in advanced!
-
Okay sorry I thought it was concrete. So yes you should do the 2x8 construction / decking.
-
2 minutes ago, Evolution said:
Angela, that does look better than what I've be able to do so far. Not sure how you got it to this point, I can't open the file, as I am running X12 not worth the cost to upgrade, but thanks!
Sorry I didn't realize it was X12.
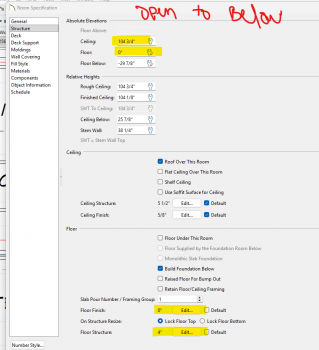
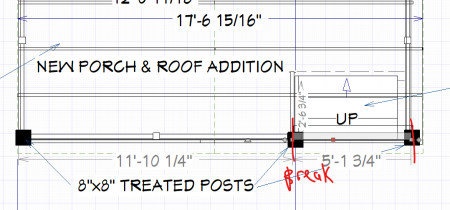
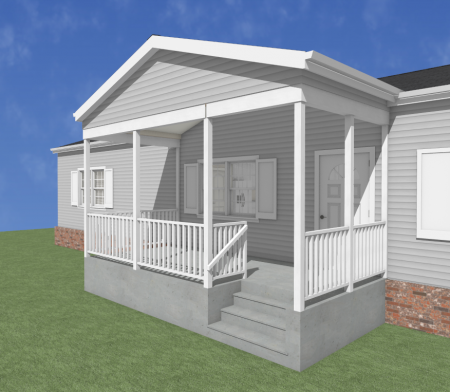
First thing I did was make sure the heights are matching for the Porch / Open to Below, as well as the floor finish / structure.
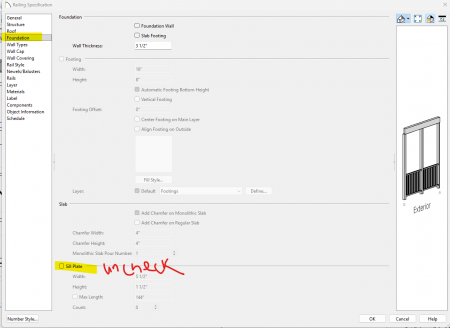
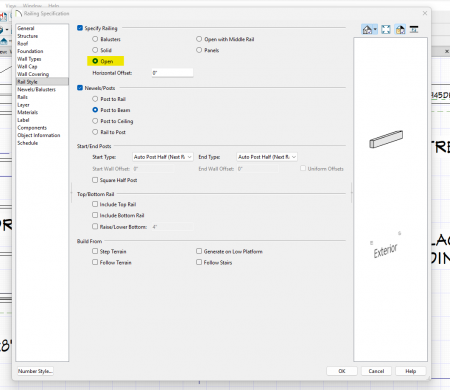
Uncheck Sil Plate in the railing specifications.
Continue the railing across the stairway, but "break" into a separate section.
Then the separate section over the stairway would just be the Beam. No Railing.
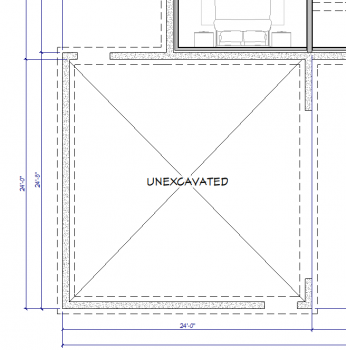
I drew foundation walls below. As mentioned made the stair tread # reduced, and changed it to concrete.
I could be wrong but I don't think there is a cost to upgrade to the new Chief? I think the monthly / yearly subscription covers all of them? Could be wrong.


-
 1
1
-
-
Hi Bob, I tried to fix it as best as I could. Only the front beam won't connect there is a small space you may need a polyline solid to fill it in.
It seemed like you had too many steps so I made it the minimum number just over 7" riser height. New file attached, hope it helps!
-
1
-
-
22 hours ago, SusanC said:
Hi Everyone,
Please take this 3 question survey put out by California Faucets and let them know that we want to see their catalog in Chief. This is a golden opportunity to make our voices heard from a company that is actually asking for our opinion!
- Survey is only 3 short questions and it is anonymous.
- Chief prefers to work with .DAE, .OBJ, and .SKP file formats to develop the .CALIBZ catalogs.
- https://www.calfaucets.com/designer-survey-2025?utm_source=brevo&utm_campaign=Designer Survey - CAD FILES&utm_medium=email
Thank you!!
Susan
Hi Susan - the link is not working FYI
-
3 hours ago, DBCooper said:
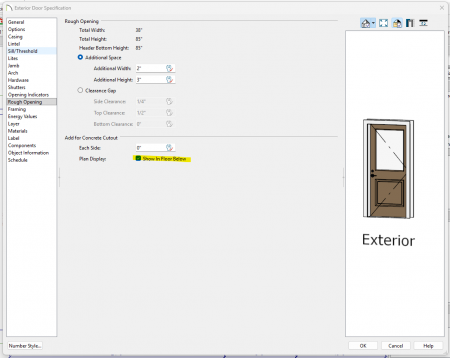
Are your doors actually low enough to make a cutout in the foundation walls? If they are, then you should probably post your plan.

Thank you @DBCooper That worked!
Thanks for your help too @tundra_dweller!
-
1
-
-
4 minutes ago, tundra_dweller said:
Maybe you are looking to turn on the "Opening Header Lines" layer in you reference view?
I wondered if it was a layer, I tried that and it didn't do anything

-
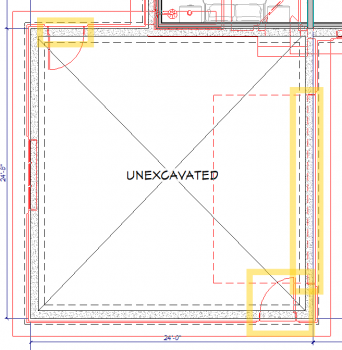
Hi there,
I would like to show a dashed line where the man door / overhead door openings are in the foundation plan.
It used to default when I used X15 but since using X16 I can't seem to figure out how to show it.
Thanks in advanced!
Ange
-
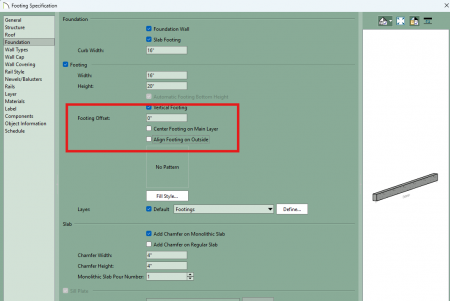
2 hours ago, tundra_dweller said:
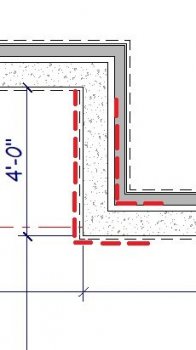
@Ange822 If you go to the "Foundation" tab in your wall specs you should be able to hit the "Center Footing on Main Layer" box to get what your after.
Amazing thank you!!
-
1
-
-
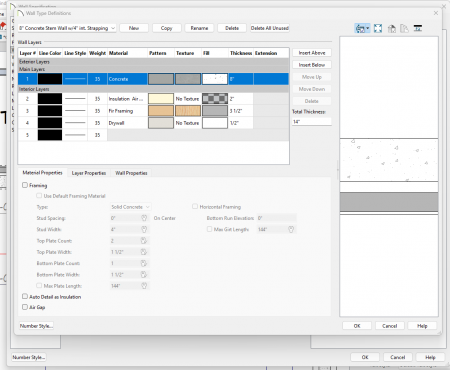
Hi there,
How can I move the footing dashed line so it is centered on the foundation concrete only, and not centered on the entire wall depth including the framed wall.
Thank you in advanced!

-
On 5/9/2025 at 12:40 PM, Doug_N said:
Hi Angela,
Perhaps post the plan file on the forum. I would like to see what is happening there as well. It is not clear, at least to me what you are trying to do, so maybe a bit more description.
Now for something else, are you currently a BCIN designer?
Hi @Doug_N, Rob was able to help me I had emailed him my plan.
My apologies for the late response I was on holidays with no service.
I do not currently have my BCIN # (only legal), but have been studying and am writing the Small Buildings next week.
thanks,
Angela
-
4 hours ago, robdyck said:
Hi Angela, I'd suggest trying a material region first. If you send me your plan file, I'll take a look and proposed the best solution I can come up with!
Thanks Rob - I just emailed you the file! I appreciate you taking a look at it!
-
Hi there, I am having issues with walls intersecting. Specifically I would like the the plywood / siding to be dragged back. Every time I seem to drag the layers back, it seems to just go back to where it was? Not sure what I'm doing wrong here. I have attached some images and also took a screen video. Thank you very much in advance!


-
@Doug_N @GeneDavis @Alaskan_Son
Thank you all for the recommendations. I ended up creating a door symbol which worked great!
Symbol attached for anyone to use;

-
Hi there,
Is there a way to have the door slab material align so the horizontal joints line up from the front of the door / side?
Shown in the 3D view when the door is open.
Maybe a solution would be to create a door symbol using polylines so it isn't a Ship Lap Material?
Wasn't sure if there was an easy fix just using the material on a Slab Door.
Thanks in advanced!


-
On 3/11/2025 at 4:38 PM, robdyck said:
Hi Ange, you could try copying that shadow board and set it to 1/16" thickness, Eaves Only, set it to an invisible material.


Thanks Rob, this worked out perfectly! I just made a material that was 100% translucent!

-
 1
1
-
-
On 3/11/2025 at 4:31 PM, ericepv said:
Open the DBX for the roof panel and go to the 'Options' tab. There you can specify either Square or Plumb Eaves.

Thank you for the recommendation, I already have "plumb" checked off in the "options" tab.
-
Hi there - I'm wondering if there is a way to have the top fascia piece cut horizontally so it doesn't extend past the bottom fascia.
I have played around with the different depth / options but think I am missing something.
Thanks in advanced!


-
That worked thank you very much @Alaskan_Son!
-
1
-


Gable End Overhang / Eave
in General Q & A
Posted
I also realized I was playing around with the settings earlier with boxed / flush eave and it wasn't changing;
I think it'd due to the wall changes I am making there. The bandboard will run all the way to the fascia.