
.jpg.67a2c38f009a8fe144bb2ed24f34e17a.jpg)
mtldesigns
-
Posts
887 -
Joined
-
Last visited
Content Type
Profiles
Forums
Gallery
Posts posted by mtldesigns
-
-
found it..
-
That makes sense, because the previous house I did a framing schedule for each wall detail and this was a save-is.. with a new wall schedule.
How do I delete schedule that I cant see? The G schedule specifically.
-
Good morning Chiefer's,
Starting some framing details this AM. I've done about 10 of these small house plans, and this one was a modification of one of those 10. Up till now, the framing detail always showed just the "T" label. This plan however is showing a G label as well. What is it? I pick it and its part of the framing member "T".. I turned off the Framing Label and it turns off.. so its part of the members, but I don't know what it is or how to turn it off.


-
type in split wired in your browser. I'm assuming this is what you meant.
-
2 hours ago, JPAK2021 said:
ceilings to 9' on the first level
Hey JP,
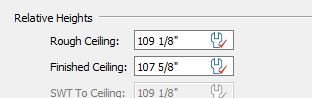
Get used to using pre cut lumber lengths for your walls too. I don't know if this is actual assignment, if so, your tech professor will explain. In essence for a 9' ceiling, your rough needs to be 109 1/8". The finish ceiling will be be based on your ceiling drywall thickness, if strapping is needed (typical in the NE), and your floor finish. Study up on this, you might impress your instructor then.
https://www.ezwoodshop.com/blog/lumber/lumber-dimensions-weird-2x4-lengths/
https://www.homeconstructionimprovement.com/why-use-pre-cut-studs-for-framing-walls/
teaching a man to fish....
-
 1
1
-
-
assuming your using premier x12?
-
try material region...
Be in camera view looking at the wall you want to change..
Build>wall>material region. Draw a box.. thats your new material. Change it to what you want, then shape it with the grips. Read up on in, and there's vids..
-
Ah... manual ceiling plane.... gotcha!
That worked.. thank you both! Dang misquotes, couldn't see the obvious.
-
LOL... dang misquotes.
-
Yes.. for this job, but it's ok... There will not be any problems on future jobs (I will use the advice you two gave). As for this project, this was a As-Build change. The builder in MI was going to use PT wood foundations (yes that's a thing) and because wood got so expense, they did a deep mono slab for frost and moved the mechanicals in the attic. I had this as an attic space too, so if I had planned accordingly, it could have been a room and then I could delete the ceiling in that room.
-
3 minutes ago, Chopsaw said:
Canadian survey where they don't use South bearings
So Canadians don't have a south? No wonder its always cold up there.
")
But, I do as Chops states as well, in situations like this, draw individual lines and reverse. Less frustration IMO
-
33 minutes ago, Chopsaw said:
deleting the ceiling surface from the roof plane above.
")
That did work, but can't be used here. The other side of that wall is a sloped (shed ceiling), so deleting the ceiling surface deletes it all. But I will use this on future endeavors that don't have this scenario.

-
I've been meaning to ask this before.. when showing a attic access by converting a poly into a "Hole In Ceiling Platform", how do you get rid of the ceiling part that was cutout, and now attached to the roof truss? Its part of the ceiling below.. I thought painting it "insulation no gap" would work, and it did, but the rest of the ceiling in that room disappeared also.

-
Very cool John.. Very detailed too. I learned some new words today, like baubles.
-
Ah, and your right. Just did one, not a group, worked as it should.
-
thinking way outside the box here.. make a copy of the model.. do the autoroof on that copy.. then copy paste back into your orig model.
-
52 minutes ago, Alaskan_Son said:
or you can click on a perpendicular dimension in which case you would be MOVING the wall along with any connected walls ends.
that's what I thought also, but just like the example, I picked the ext. and railing wall, and picked the dim that was perp to it.. both of the walls moved, but the ext. and rail wall that was perp/connected to, did not move or adjust. I mean, I can work around this, no biggie. Bu thought as you did...
-
sorry, not yelling in subject.. forgot to turn off caps
-
Curious as of late.. but it seems that IN THE PAST when moving a wall via a dimension, that most of the time any connected wall moved as well.. esp. exterior walls. Why doesn't it do this any more?

-
Actually these are two 20 year old's. They were looking for a tiny house, that you see on TV, but they realized those things are expensive.. so they went with the next best thing, a small build. Just not portable. They got some acreage and are going to live off the land as much as possible. Couto's for having a dream and going for it. Can't wait for my 28 year old to get her own place
 2 hours ago, joey_martin said:
32" w/ enough room for swing-a-way hinges
I typically make my interior doors 32", as well (36" on customers request), but since they are young, they were going to go "tiny", and the space for a extra 2" does change things. But since I've posted the plan, and updating the laundry, I have made all interior doors 30.
-
My engineer tells me that if its residential, an engineer is all you need. When I do light commercial, I need both. Hasn't got me in any trouble, so it must be true.
-
I actually like this better than vents in the doors/walls. Can put where needed.
See, that what this forum is all about.. learn from others knowledge.
Thanks
-
30 minutes ago, rgardner said:
You can look at a ERV set to pull it's intake from the room with the mini and circulate it to the other rooms
How does that work Ryan? Is it ducted via the attic? I attached the floor plan (haven't move HVAC, WH or added Mini yet), but wanted to show arrangement. The blue circle is where I had planned on for the mini.

-
Thanks all for your suggestions and info. Client loves the idea of the mini split, so will be moving WH to that niche, and getting her side by side back. Moving forward to complete construction docs.
2 minutes ago, DRAWZILLA said:vents above the doors. laundry and equip room doors
I am going to add some vents in doors for the mini to recirc.


What's a G- label?
in General Q & A
Posted
you did to Mark.. :-)
Thanks gents